I don’t think you need me to tell you this, but you can make brownies for any occasion.
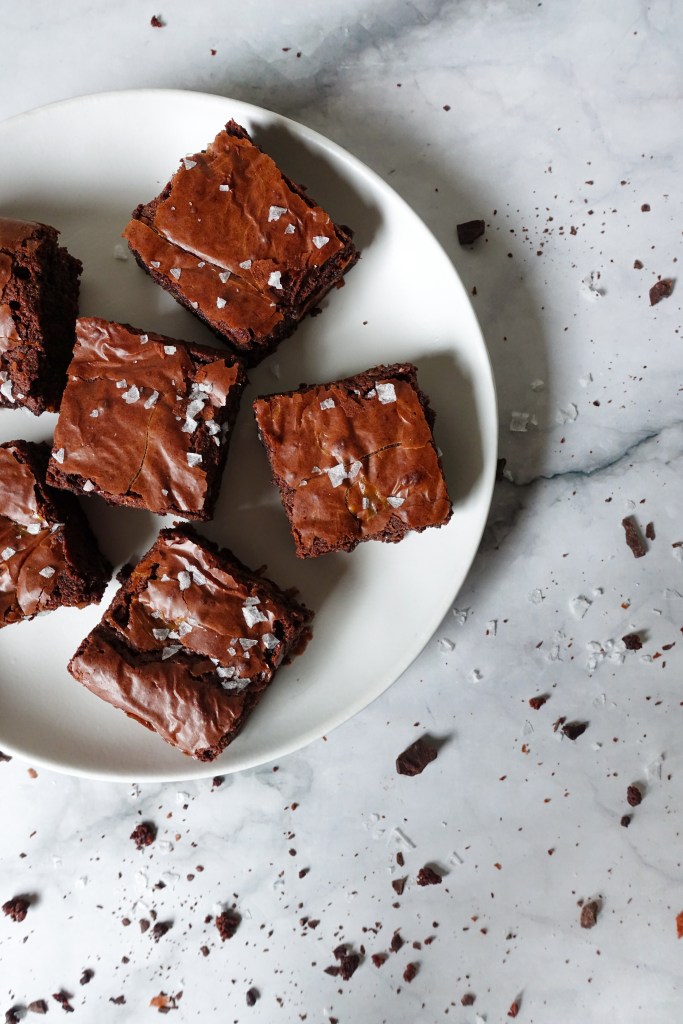
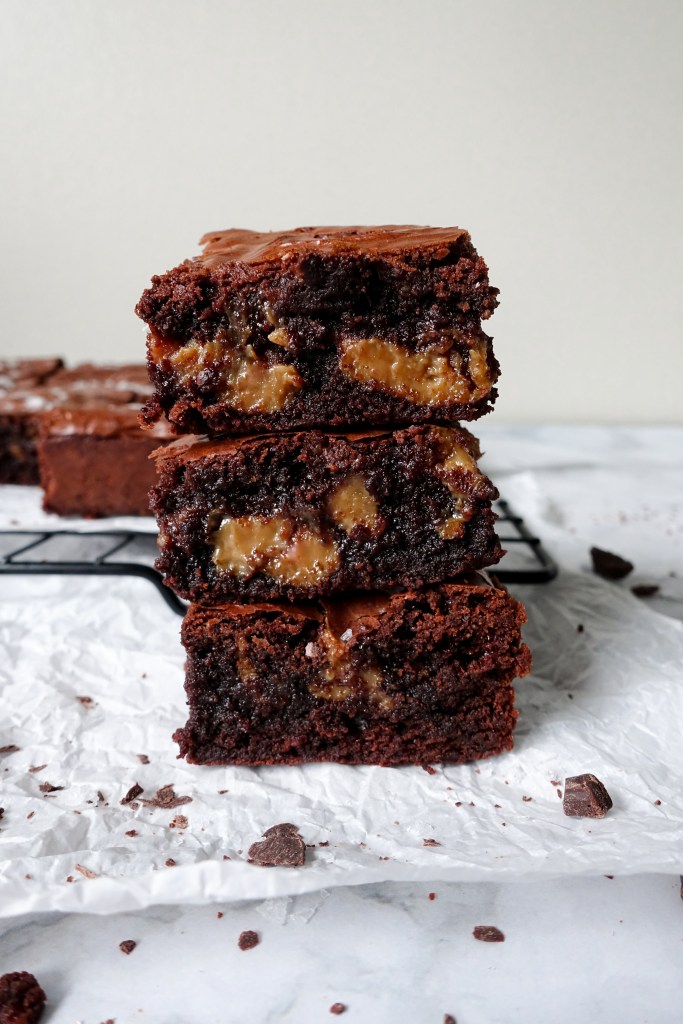
These are my all-purpose brownie. They’re equally suited for a get-together with friends (remember those?), for a care package, or just a weeknight treat. You can make them when you’re happy. You can make them when you’re sad. They’re never too formal, too finicky, too adult, or too childish. These brownies are rich, chocolatey, a little chewy, and definitely fudgy (even when properly baked through- please don’t undercook your brownies!). The dulce de leche swirl adds fun pockets of creamy dulce de leche, which provides sweetness and a gentle caramel flavour that doesn’t compete with the brownies.
This recipe is adapted from Stella Parks’ brownie recipe. It results in that crackly, glossy top that’s the stuff of legends. Some people theorize that the crackly top layer comes from a combination of butter and cocoa butter (which comes from using chocolate instead of just cocoa). Others say it’s because of how well the sugar is incorporated- the step of whipping the eggs with the sugar allows the sugar to fully dissolve. The brownies get their structure from this whole-egg foam and chocolate: this keeps them rich, chocolatey and moist, but never pasty. Browning the butter adds a lot of depth of flavour, so the result is not just one-dimensionally sweet or chocolatey. I like to add a bit of extra flour so they’re a little chewier than hers, but the texture is still beautifully fudgy by the time they’ve cooled.
Strictly speaking, the dulce de leche swirl is optional but I rarely make these brownies without it. I always have dulce de leche in my cupboard as I just make it in batches (the method I use is fairly hands-off so it’s easy and I’ve included it at the end of the brownie recipe). You can also get it premade in stores, either near the jams or the baking aisle near the condensed milk. The flaky salt is also optional but highly recommended, especially if you do use the dulce de leche. It provides a good counterpoint to both the sweetness of the dulce de leche and the slight bitterness of the dark chocolate.
Notes:
- I make these in a stand mixer but you can do it with a hand mixer if you don’t have one. If you have a stand mixer you can overlap the butter-browning and egg-whipping steps. If you’re using a hand mixer just brown the butter, stir the chocolate in, and keep it in a warm place until your eggs are whipped. This is also theoretically possible with a whisk but I don’t really recommend it unless you have way more willpower than I do (and start with room temperature eggs).
- These brownies are rich. I make them in an 8×8 pan and that’s enough for me to have a few and share a few. This will use half a can of dulce de leche, so if you want to use the whole can or intend to share these widely, you can double the quantities easily and bake in a 9×13 pan. You may need to add a couple minutes to the baking time or you can take the temperature of the centre. Be sure to use a metal pan as the cooking time will vary widely if you use a glass or ceramic baking dish.
- If you want the dulce de leche swirls to be visible from the top, let the batter sit in the baking pan for about 5-10 minutes before swirling in the dulce de leche.
- If you can’t find dulce de leche, you can use a thick caramel sauce or melt down soft caramels with a small splash of cream, then cool slightly and use.
Dulce de Leche Brownies
Makes 1 8×8 pan of brownies
Ingredients
- 170g (3/4 cup) unsalted butter
- 85g 70% dark chocolate, chopped into small pieces
- 225g sugar
- 27g brown sugar
- 1 tsp (2g) kosher salt
- 148g egg (3 large), cold from the fridge
- 7g (1 1/2 tsp) vanilla extract
- 1/2 tsp instant espresso powder
- 80g all-purpose flour
- 50g Dutch-processed cocoa powder
- 150g (approx. half a can) of dulce de leche (see note at end)
- Flaky salt, for sprinking
Preheat the oven to 350°F. Line an 8×8 metal baking pan with parchment paper.
To brown the butter, place butter in a saucepan over medium heat, allowing the butter to melt. Once it’s all melted, stir it often with a silicone spatula, making sure to scrape the solid bits off the bottom. Continue heating until the butter foams and the white milk solids start to turn golden brown, then pour it into a heat-safe bowl. Allow to cool for a minute and then add the chopped dark chocolate, stirring to completely melt the chocolate.
In the bowl of a stand mixer, combine the sugar, brown sugar, salt, eggs, vanilla, and instant espresso. Use the whisk attachment to beat the ingredients to thick, pale, and just slightly aerated- this should take around 8-10 minutes on medium-high.
While the egg-sugar mixture is being whipped, sift the flour and cocoa powder together into a medium bowl. If your dulce de leche is solid, warm it slightly to a spreadable consistency and place in a piping or zip-top bag. The bag is optional, but makes the swirling step far less sticky.
Once the eggs are significantly paler and thick, turn the mixer to low and stream in the melted butter/chocolate mixture. Stop the mixer, add the flour and cocoa powder, and then mix on low until just combined. Using a silicone spatula, scrape the sides and the bottom to make sure there aren’t any flour pockets.
Pour the batter into the prepared baking pan. Either by squeezing out of a bag or by using two spoons, drop dollops of the dulce de leche across the surface of the batter. Pull a butter knife through the dollops to swirl them through the batter.
Bake for about 30 minutes or until the middle is set (doesn’t jiggle when you move the pan) and the internal temperature is about 205°F (96°C). If using, sprinkle with flaky salt when you take the brownies out of the oven.
Cool completely in the pan and then use the parchment overhang to remove the brownies from the pan and cut according to preference. For clean cuts, wipe the sides of the knife between cuts.
Store in an airtight container at room temperature up to 4 days.
Dulce de leche:
I make my own dulce de leche at home as good dulce de leche is not always available in stores near me. I can’t fully endorse this method because of safety reasons, but what I do is:
- Take the labels off of 300g cans of sweetened condensed milk
- Place them sideways in the bottom of my tallest pot in a single layer
- Fill the pot generously with water (at least an inch of water above the top of the cans) and bring to a boil
- Once it reaches a boil, I turn it down and simmer the cans on the stove for 3-3.5 hours, checking the water level every 30 minutes to make sure it’s at least 1 inch above the top of the cans (this is very important for safety!)
- After that, I carefully remove the cans from the water and leave them to cool completely before opening, usually overnight (also important for safety!)
- Unopened, this lasts a couple of months in the cupboard. Once opened, I keep it in the fridge for up to a month.