I’ve been baking a lot lately. It’s a great time of year to be baking seasonally- spring rhubarb has given way to summer berries, and I’m definitely taking advantage. I’m having a great time making tarts, cakes, and jams, and eating more strawberries than any one person should. My pie intake is through the roof. But something I keep coming back to is black sesame.
If you’ve never used black sesame before, please consider this a humble invitation to start. It’s dark and mysterious, with familiar sesame notes hidden behind an inky black coat. It’s rich but not overbearing, nutty but not dry. Black sesame lends itself incredibly well to sweets, bringing savouriness and a bare hint of bitterness to balance everything out. And it plays very nicely swirled in a rich, fluffy bun to become something that feels right as a breakfast food but also an any-time-of-day dessert.
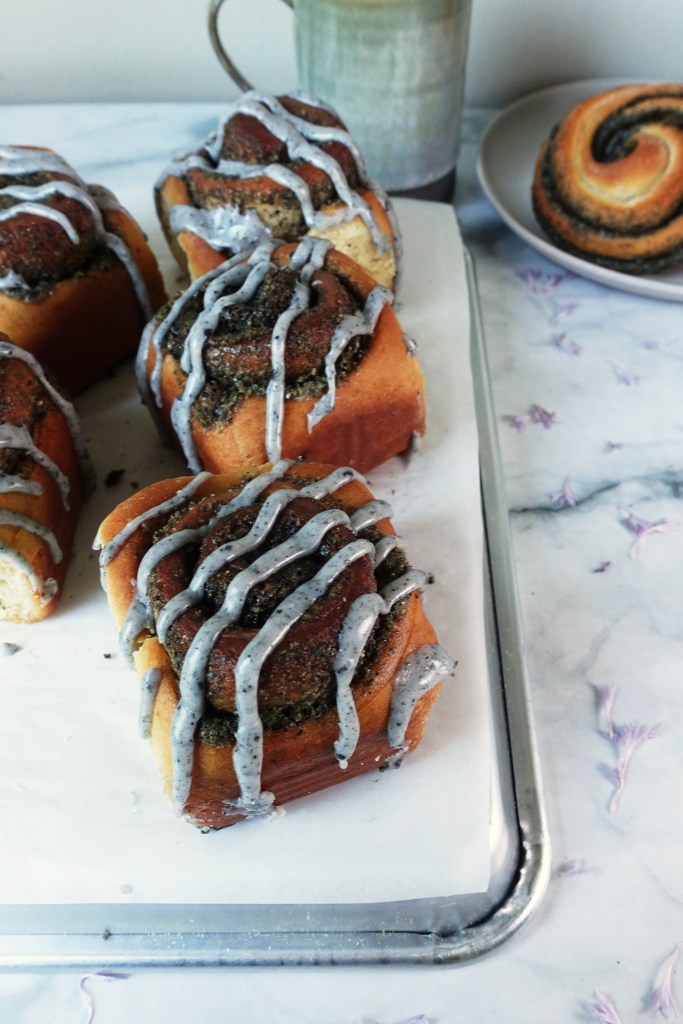
These buns are an enriched yeast dough. They’ve got the usual suspects for bread- flour, yeast, and salt, but the eggs, dairy, and sugar keep everything tender and rich. Spreading the black sesame filling over the dough and rolling everything up creates layers of soft bun flecked with black sesame, and the (optional) icing adds another, sweeter layer that reinforces that nutty flavour.
There are two timing options for this recipe: same-day or overnight. The same-day option is pretty straightforward and takes a couple of hours (mostly inactive), depending on how warm your kitchen is. I prefer to let the dough rise overnight for 2 reasons: letting the dough rise in the fridge helps it develop deeper flavours while it’s slowed down, and this dough is easy to work with when it’s cold. You can do the overnight rise either after the dough is mixed (bulk fermentation) or after they’re shaped (for proofing)- I opt for the cold bulk fermentation and shape the rolls the next day, but if you want to do all of the work the night before and just bake them in the morning, you do you. In either case, just make sure they’re covered well (with plastic wrap or a lid) to make sure they don’t dry out in the fridge.
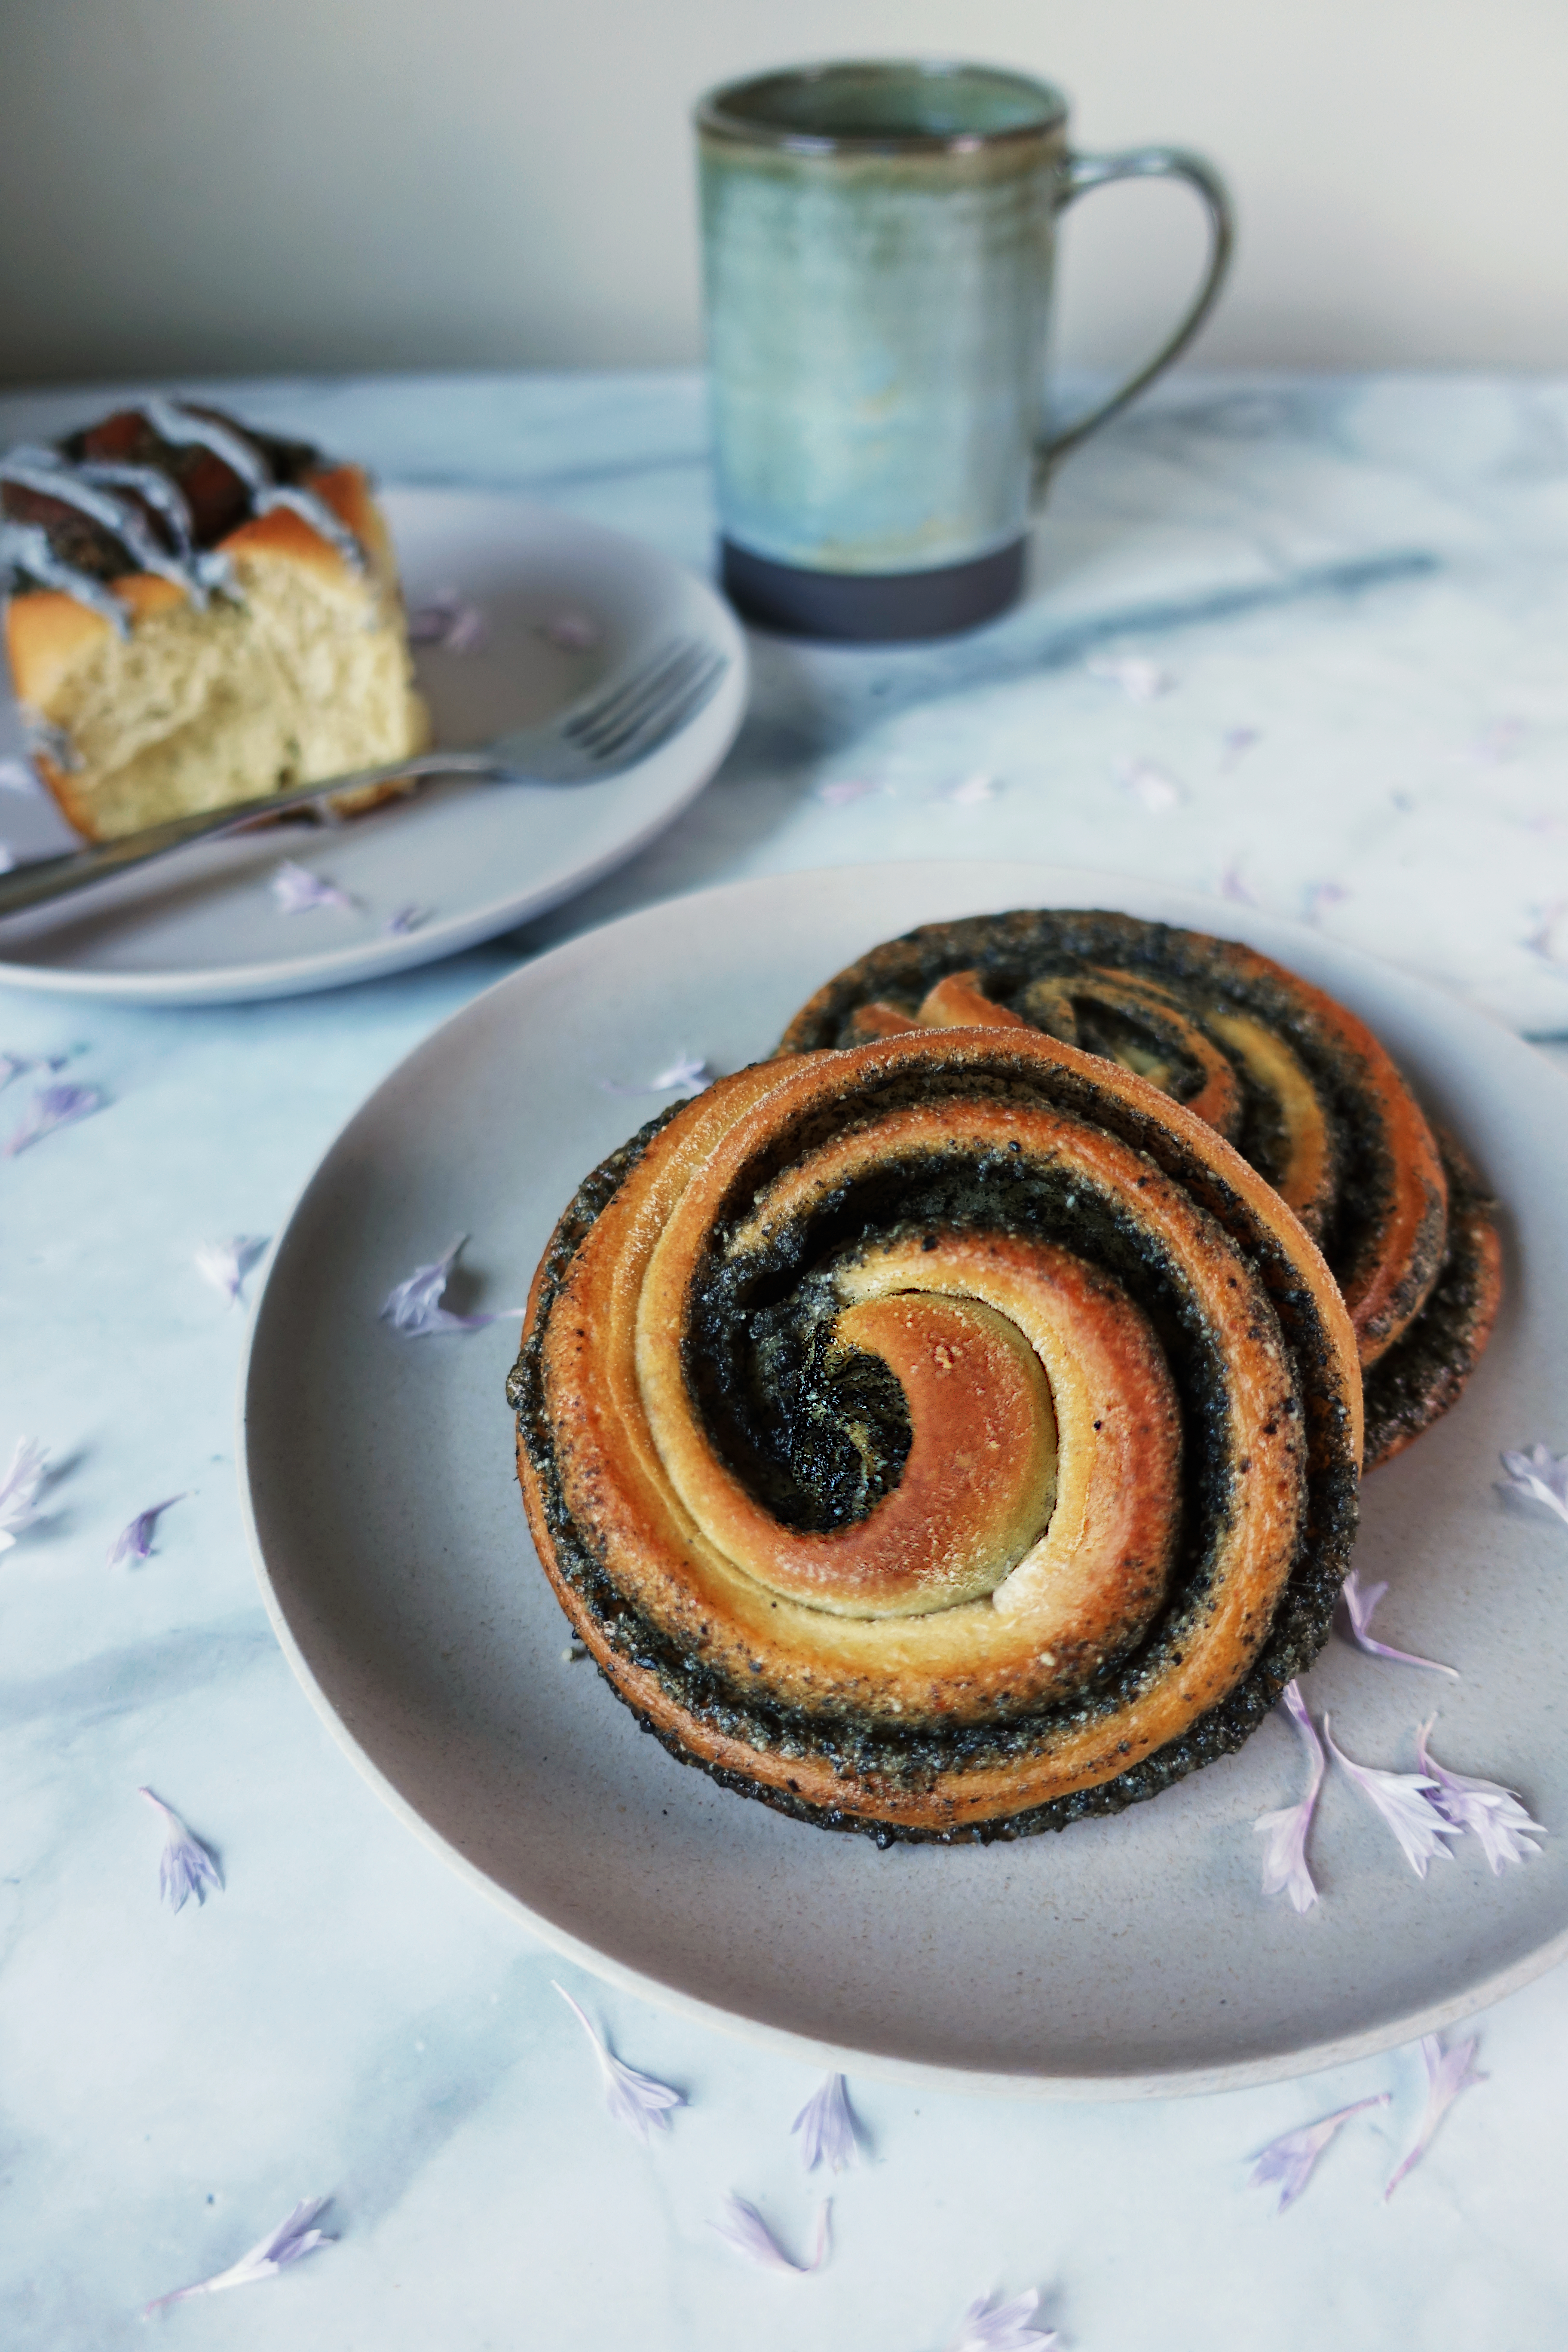
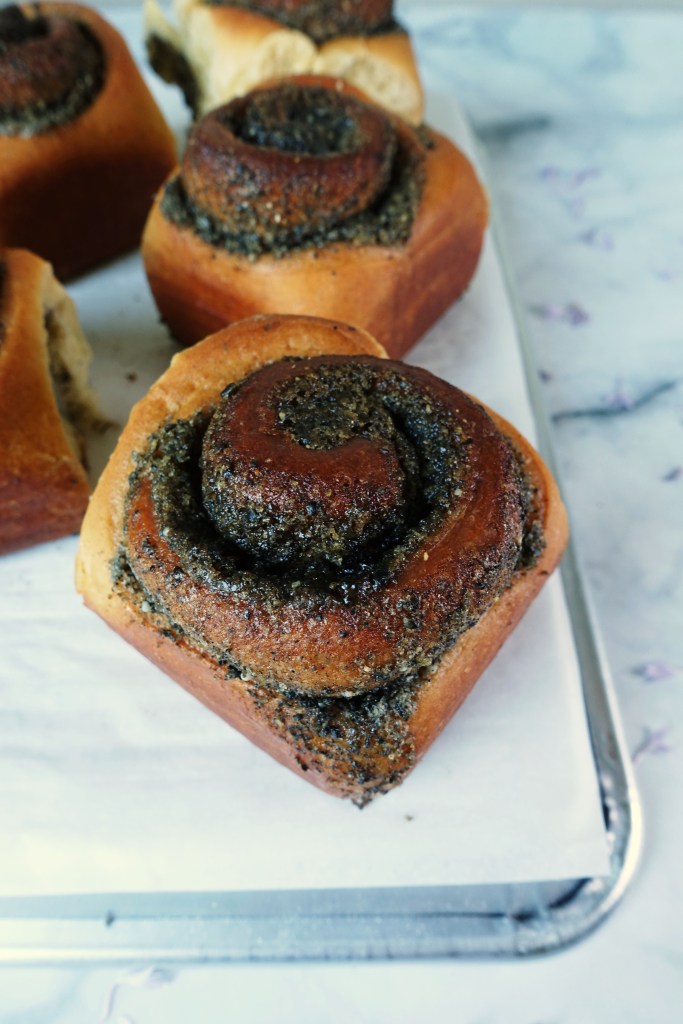
You can roll this dough like cinnamon buns in a 8×8 square pan, or swirl them freeform on a baking sheet. Both have their advantages-the ones baked in a pan tend to keep fresh a bit longer, while the swirls get a lightly caramelized crust on the bottom where the filling touches the pan.

Black Sesame Buns
Bun Dough
- 190g (3/4 cup) milk, warmed to about 45 degrees Celsius
- 2 tsp (6g) instant yeast
- 350g (scant 3 cups) all-purpose flour
- 3/4 tsp (3g) kosher salt
- 50g (1 large) egg, lightly beaten
- 40g (1/4 cup) sugar
- 45g (3 tbsp) unsalted butter, softened to room temperature, cut into 1/2 inch pieces
Filling
- 100g (1/2 cup, packed) light brown sugar
- 112g (1/2 cup) butter, softened to room temperature
- 50g black sesame seeds
- 1/4 tsp kosher salt
Glaze (optional)
- 1 tbsp (8g) black sesame seeds
- 100g powdered sugar
- 4 1/2 tsp milk
- Pinch of kosher salt
Equipment
- Stand mixer with dough hook
- Rolling pin
- 8×8 square pan
- Food processor/mortar and pestle/plastic bag to crush seeds
To make the dough:
Combine flour, yeast, salt, and sugar in the bowl of a stand mixer equipped with a dough hook.
With the mixer turned on to low, add the milk and the egg and mix until everything is combined and no dry flour spots remain.
Turn the mixer up to medium and mix for 2 more minutes, and then add the butter one piece at a time until the mixer running. Try to wait until one piece is mixed in before adding the next.
Continue mixing on medium until the dough is smooth and sticks to itself in a cohesive ball, about 6 minutes. When the dough is fully developed, it will be sticky but should pass the windowpane test.
Loosely shape the dough into a ball and transfer to a clean bowl and cover with plastic wrap or a lid for bulk fermentation (the initial rise before shaping).
For the same day option, let it sit at room temperature until doubled in size (about 30 mins to 1 hour) before proceeding, but I’d strongly recommend putting it in the fridge for the last 10 minutes to make it easier to roll out in the next step. For the overnight option, allow the dough to sit at room temperature for 15 minutes and then transfer to the fridge to rise overnight.
After the dough has completed its first rise- doubled in size for the same day option or the next morning, for the overnight option, sprinkle a pinch of flour over the top, punch the dough down and re-cover. Let that sit while you make the filling (instructions below) and get your work station ready: you need a clean countertop, a rolling pin, a knife or bench scraper, and a bit of extra flour for dusting.
Dust the countertop with a bit of flour. Turn the cold dough out and sprinkle with just enough flour to prevent sticking, and pat it into a rectangle.
For the “cinnamon bun” option: Roll the dough out, starting from the centre and working outwards, into a 21×12 inch rectangle. Lift the dough off the counter occasionally while you roll it out, to prevent sticking and to let it spring back a bit before you check the length.
When the dough is rolled out into the 21×12 inch rectangle, use an offset spatula or the back of a spoon to spread the filling across the top, leaving a 1 inch border along the long edge farthest from you. Beginning with the edge closest to you, roll the dough up away from you. Try to make it as snug as you can without actually stretching the dough- the idea is to make the roll neat but not so tight that it stretches.
If by now the dough has warmed to room temp and is floppy and difficult to work with, you can pop it on a tray with the seam down and stick it in the fridge or freezer for a few minutes to help firm it up before cutting. At this point, line an 8×8 square pan with parchment paper or grease with butter.
I like to cut the uneven ends off (and bake them separately, as a snack) when I divide the rolls to make the final product neater, but that’s up to you. In either case, cut the dough log into 9 equal pieces and place them cut-side up in the square pan, 3 rolls by 3 rolls. Cover that with plastic or a clean towel and place it somewhere warm for its second rise (proofing), about 30-45 minutes.
For the “swirl” option, line a couple of trays with parchment paper. Roll the dough out to about a 27×9 inch rectangle with the longest edge closest to you. Spread the filling across the left 2/3 of the dough, all the way to the edges. Take the un-filled right third and fold it over the middle third, then fold the left third and fold it over the middle (like folding a letter to put in an envelope). Cut vertically into 1-inch strips. You can refrigerate the dough for 10-15 minutes before or after cutting, if it’s getting soft and floppy at this point.
Starting from the middle of where you want the bun to be on the tray, place one end with the cut edge up and lay it on the tray in a spiral- when you get to the end, just tuck it underneath the spiral towards the centre. Repeat with the remaining strips, leaving at least 3 inches between buns. Proof 30-45 minutes covered lightly in plastic.
When the dough is almost fully proofed, turn on your oven to 350 degrees Fahrenheit with a rack in the middle. You can check the proof by gently poking the side of a roll. If your finger makes a dent that quickly fills itself back in, it’s not ready yet. The dough is fully proofed when poking it leaves a dent that slowly fills itself back in most of the way. If it doesn’t spring back at all, then it’s overproofed and should be baked right away.
Bake the rolls for 30-40 minutes until the tops are deep golden brown, rotating once halfway if your oven doesn’t heat evenly. The middle of the buns should register at least 87 degrees Celsius, and if (carefully) poked, the middle bun should spring back and not feel doughy.
Allow to cool at least 10 minutes in the pan before removing and glazing. Store in an airtight container.
To make the filling:
If you make the glaze, you can toast and crush the black sesame seeds for the filling and glaze together- just set 1 tbsp of crushed seeds aside for the glaze before making the filling.
Toast the black sesame seeds in a dry pan set to medium heat, stirring constantly, until they start popping or become fragrant. Remove to a wide bowl and allow them to cool.
Crush the seeds until they’re broken up but not yet a paste- my spice grinder does this in a few seconds, or you could pulse them in a food processor or in a mortar and pestle. If you don’t have any of those things, you can crush them on a cutting board underneath a heavy pan, or pour them into a sealable plastic bag and crush the with your rolling pin.
In a medium bowl, combine the brown sugar, butter, crushed black sesame seeds, and salt, mixing until a uniform paste forms.
To make the glaze:
Whisk together the powdered sugar, crushed black sesame seeds, and salt together, and add milk by the teaspoon until you get the consistency you want. I opt for drizzling because the glaze is pretty sweet-make it a little thicker than pourable in that case. It should be able to run off a spoon slowly and take a few seconds to lose its shape. It’s easier to add liquid gradually to thin the glaze than to add extra powdered sugar to thicken it, so avoid pouring it all in at once. Keep covered until the rolls are cool enough to glaze, and mix it up before using if a crust forms on the top.